DIY Greenhouse Building Guide
Building your own greenhouse can extend the growing season, protect plants from harsh weather, and boost yields. This guide walks you through every phase—from planning and material selection to final ventilation tweaks. By the end, you’ll have a functional, budget‑friendly greenhouse you can be proud of.
How to Build a DIY Greenhouse: Complete Step‑By‑Step Guide 2025
Introduction
Creating a greenhouse at home is one of the most rewarding DIY projects for gardeners of any skill level. Whether you’re a beginner looking for a simple structure or an experienced grower wanting a custom‑fit space, this guide shows you how to build a DIY greenhouse from the ground up. You’ll learn why a greenhouse matters, the core benefits it offers, and the exact steps you need to follow to finish a sturdy, weather‑resistant shelter for your plants. The tutorial is broken into clear phases—planning, framing, covering, and finishing—so you can track progress and stay organized. Let’s get started and turn your garden dreams into a thriving, year‑round oasis.
Quick Overview
| Aspect | Details |
|---|---|
| Prerequisites | Basic carpentry tools, level ground, 1–2 days of free time |
| Estimated Time | 8–12 hours total (including drying time for sealants) |
| Skill Level | Beginner to intermediate |
| Tools & Materials | 2×4 lumber, polycarbonate panels, screws, hinges, sealant, drill, saw, measuring tape, level, shovel |
| What You’ll Learn | Site selection, framing techniques, ventilation design, waterproofing, and maintenance tips |
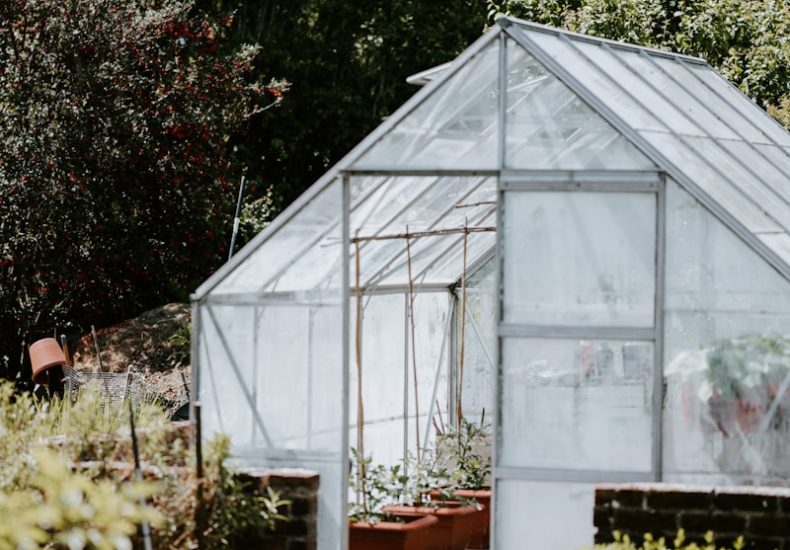
What Is a DIY Greenhouse?
A DIY greenhouse is a self‑constructed, transparent enclosure that captures solar heat to create a controlled micro‑climate for plants. Unlike commercial glass structures, a DIY greenhouse can be built from affordable materials such as wood, PVC, or metal frames covered with polycarbonate, polyethylene film, or even reclaimed windows. Its purpose is to extend the growing season, protect delicate seedlings, and enable year‑round cultivation of vegetables, herbs, and ornamental plants. Common misconceptions include the belief that a greenhouse must be expensive or require complex engineering—both are false. With proper planning, even a modest backyard can host a functional greenhouse that delivers real horticultural benefits.
Why It’s Important or Useful
Investing time in a DIY greenhouse pays off in several tangible ways:
- Extended Growing Season: Capture early spring warmth and protect crops from frost.
- Higher Yields: Consistent temperature and humidity boost plant productivity.
- Cost Savings: Grow your own produce, reducing grocery bills and carbon footprint.
- Educational Value: Great hands‑on project for families, schools, or community gardens.
Imagine harvesting fresh tomatoes in December or starting seedlings in February—those are the real‑world benefits that make a greenhouse a smart addition to any garden.
Tools, Resources, or Requirements
Before you dive into construction, gather the following items. All links are placeholders; replace them with your preferred suppliers.
- Measuring Tape (25‑ft): Essential for accurate dimensions.
- Carpenter’s Square & Level: Guarantees square corners and level frames.
- Circular Saw or Hand Saw: For cutting lumber to size.
- Power Drill & Drill Bits: For pre‑drilling holes and driving screws.
- Deck Screws (2‑in. to 3‑in.): Corrosion‑resistant for outdoor use.
- 2×4 Lumber (treated): Frame skeleton; quantity depends on greenhouse size.
- Polycarbonate Panels (4‑mm double‑wall): Transparent covering; offers UV protection.
- Hinges & Latches: For doors and ventilation windows.
- Silicone Sealant: Waterproofing joints.
- Shovel & Gravel: For foundation preparation.
- Safety Gear: Gloves, safety glasses, ear protection.
Recommended skill level: Basic carpentry (measuring, cutting, screwing). No prior greenhouse experience needed.
Step‑By‑Step Guide
Step 1 – Choose the Right Location
Select a site that receives at least 6‑8 hours of direct sunlight daily, has good drainage, and is sheltered from strong winds. Mark the corners with stakes and use a string line to visualize the footprint. Avoid low‑lying areas where cold air settles at night.
Step 2 – Prepare the Foundation
Clear vegetation and level the ground to within ±2 cm. Lay a 4‑inch layer of compacted gravel to promote drainage and prevent moisture wicking into the wood. For added stability, you can embed pressure‑treated 4×4 posts in concrete footings (12‑in. deep).
Step 3 – Design Your Frame Dimensions
Typical beginner greenhouses range from 6 × 8 ft to 10 × 12 ft. Sketch a simple plan: height of 7‑ft at the ridge, 3‑ft at the eaves. Use a spreadsheet or free online garden planner to calculate lumber lengths. Remember to account for door and ventilation openings.
Step 4 – Cut and Assemble the Base Frame
Cut 2×4s to the exact lengths for the side walls and end walls. Lay out the base rectangle on the ground, pre‑drill pilot holes, and secure corners with 3‑in. deck screws. Double‑check squareness with a carpenter’s square before tightening fully.
Step 5 – Build the Side A‑Frames
Each side A‑frame consists of two angled rafters meeting at the ridge. Cut the rafters using a 30‑degree angle cut at each end to form a neat peak. Attach them to the base with metal brackets for extra strength. Add a horizontal top plate (2×4) to lock the ridge together.
Step 6 – Install Door and Ventilation Windows
Frame a 3‑ft wide door using 2×4 studs, then attach hinges to the side wall. For ventilation, cut two 2‑ft high windows near the roofline; mount them on hinges so they can be opened on hot days. Seal all edges with silicone to keep drafts out.
Step 7 – Attach the Polycarbonate Cover
Start at one end and lay the first polycarbonate panel against the frame, leaving a ½‑inch gap for expansion. Secure with self‑tapping screws every 12‑in., using rubber washers to prevent water leaks. Overlap subsequent panels by at least 2‑in. and repeat until the entire structure is covered. Trim excess with a utility knife.
Step 8 – Seal and Weatherproof
Run a continuous bead of silicone sealant along all interior seams, door frames, and window perimeters. Apply a thin coat of exterior-grade paint or wood preservative to any exposed wood to extend its lifespan.
Step 9 – Add Interior Fixtures
Install simple shelving using 2×4s and plywood, or hang hanging baskets from the roof. Position a small fan for air circulation and a thermometer/hygrometer to monitor conditions. If you plan to heat the greenhouse, allocate space for a small electric heater or solar water heater.
Step 10 – Test and Adjust
Open and close the door and windows to ensure smooth operation. Check for any water leaks after a light rain or sprinkler test. Adjust ventilation angles if humidity builds up. Once everything functions correctly, you’re ready to move plants inside.
Extra Tips, Shortcuts, or Best Practices
- Do use double‑wall polycarbonate: It provides better insulation than single‑layer glass.
- Don’t skip the gravel base: It prevents rot by keeping the wood off the soil.
- Apply a reflective Mylar sheet on the interior walls to bounce light onto lower plants.
- Install a simple drip irrigation system early to save watering time later.
- Consider a removable side panel for easy access during peak summer heat.
Common Mistakes and How to Avoid Them
- Incorrect site orientation: Planting a greenhouse facing north reduces sunlight. Always orient the longest side east‑west.
- Using untreated lumber: Untreated wood rots quickly. Choose pressure‑treated or cedar for longevity.
- Skipping ventilation: Overheating can scorch plants. Include at least two operable vents—one high, one low.
- Improper sealing: Gaps let in drafts and moisture. Use silicone sealant generously on all joints.
- Overloading the frame: Adding too many heavy shelves can warp the structure. Keep shelving light and evenly distributed.
Advanced Techniques or Next Steps
Once you’re comfortable with a basic